How to Identify and Replace Common Milling Machine Parts?

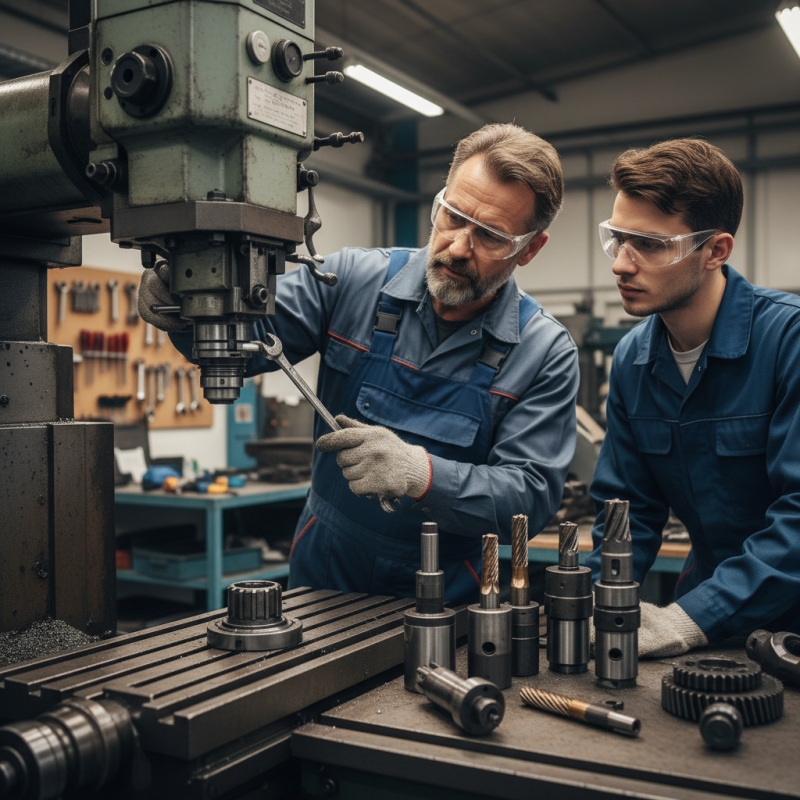
When working with milling machines, understanding the components is crucial. Expert Jim Lawson, a veteran in the milling machinery sector, once said, "Knowing your milling machine parts can save you time and money." This highlights the importance of identifying and replacing parts effectively.

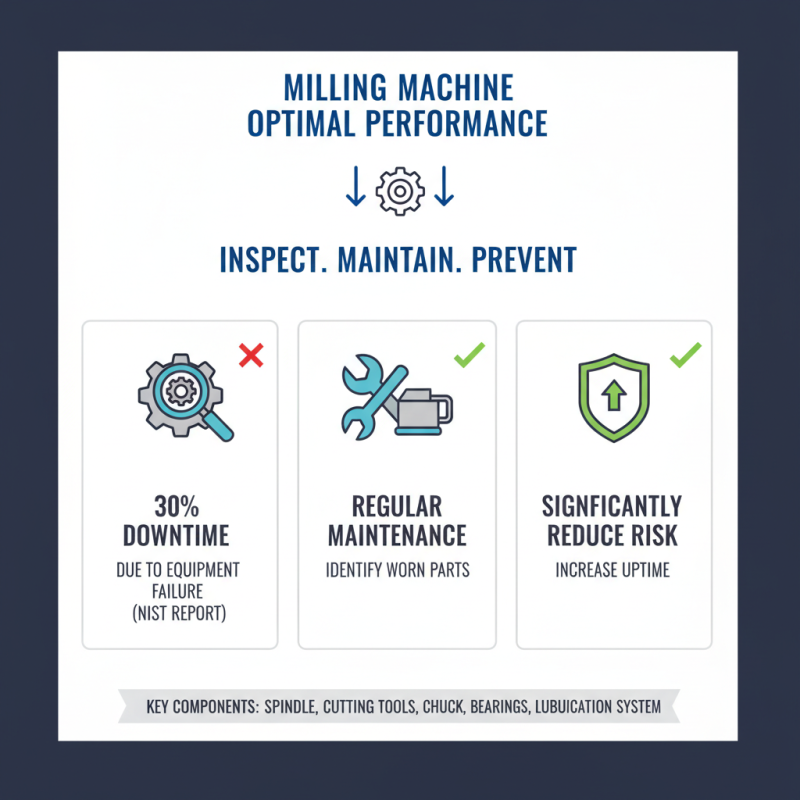
Milling machine parts are vital for efficient operation. Regularly inspecting these components can prevent costly downtimes. Each part, from the spindle to the table, plays a unique role in machine function. Knowing when and how to replace these parts can enhance productivity.

However, not everyone feels confident in recognizing these parts or their signs of wear. Sometimes, professionals overlook minor issues until they become major problems. Taking the time to learn about milling machine parts can be a game-changer. Enhancing your skills in this area could mean a smoother workflow in the long run.

How to Identify and Replace Common Milling Machine Parts?

Understanding Common Milling Machine Parts and Their Functions

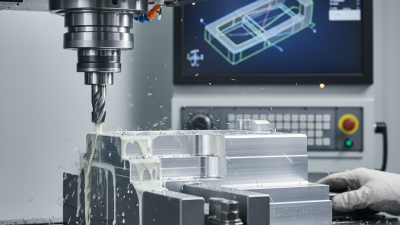
Milling machines are essential tools in manufacturing. Understanding their components is crucial for effective operation. Key parts include the spindle, table, and tooling systems. The spindle is vital for holding and rotating cutting tools. Reports suggest that spindle issues account for nearly 25% of maintenance downtime in milling operations. Keeping it healthy boosts efficiency and precision.

The table plays a significant role. It supports workpieces during machining. A stable, well-aligned table ensures accuracy. Misalignment can cause significant errors and felt across production. About 30% of machining errors stem from table issues. Regular inspections can mitigate these risks.

Tooling systems vary widely. They include end mills, drill bits, and specialized cutters. Each tool serves distinct purposes, impacting overall productivity. According to industry surveys, over 40% of operators struggle with tool wear monitoring. This lack of attention can result in unanticipated costs and delays. Regularly reviewing tool conditions is essential.

Tools Required for Identifying and Replacing Milling Machine Parts

How to Identify and Replace Common Milling Machine Parts?

When it comes to identifying and replacing parts in a milling machine, having the right tools is crucial. A set of basic hand tools will help you effectively inspect and change components. A wrench set is essential for loosening and tightening bolts. Screwdrivers of various sizes can assist in accessing hard-to-reach areas. You might also need a set of pliers for gripping odd-shaped parts.

In addition, measuring tools like calipers and micrometers are vital. They ensure that new parts fit accurately. A magnifying glass can be useful for inspecting small components. Sometimes, you may find wear and tear that's not immediately visible. Lighting plays a significant role too; ensuring bright illumination helps spot problems.

It's easy to overlook specific areas of the machine when inspecting. You might miss a worn gear or a loose belt. Taking your time to check every section is important. Don't rush through the process. Reflect on the condition of each part you handle. Each replacement provides an opportunity to learn more about the machine's operation. Being meticulous will save you from future headaches.

Step-by-Step Guide to Inspecting Milling Machine Components

How to Identify and Replace Common Milling Machine Parts?

Inspecting milling machine components is essential for optimal performance. Regular maintenance helps identify worn parts before they fail. According to a report by the National Institute of Standards and Technology, 30% of manufacturing downtime results from equipment failure. A thorough inspection can significantly reduce this risk.

Begin by evaluating the spindle. Look for excessive wear or noise during operation. A quick visual check can reveal obvious issues. Next, inspect the bearings. They should feel smooth with no signs of damage. Use a dial indicator to measure runout. This can help detect issues early.

Don’t forget the motor and drive system. Loose belts or misaligned pulleys can cause inefficiency. Be aware of vibrations that may indicate potential problems. Small cracks or unusual wear patterns on any component can signal a need for replacement. Using these techniques, you can maintain your milling machine effectively. Regular checks help extend the machine's life and ensure precision in work.

Proper Techniques for Removing and Installing Milling Machine Parts

When working on a milling machine, proper techniques are vital for removing and installing parts. Begin by gathering the right tools. These may include wrenches, pliers, and screwdrivers. Ensure the machine is turned off and unplugged. Safety comes first. Missteps can lead to accidents or damage.

Next, carefully disassemble the part. Take notes or photos to remember the arrangement. This can be helpful later. Be gentle with components. Some may be tightly fitted or corroded. Patience is key. For stuck parts, a gentle tap can work wonders, but avoid excessive force.

When it’s time to install, clean the area first. Dust and debris can interfere with performance. Align the new part carefully. Tighten screws evenly, checking that everything fits snugly. If resistance is felt, something might be off. It’s better to review the installation than rush. Attention to detail pays off in functionality and longevity.

How to Identify and Replace Common Milling Machine Parts

Part Name Common Issues Identification Methods Replacement Steps
Spindle Excessive vibration, noise Listen for abnormal sounds, check for lateral movement Power off, disconnect power, remove retaining bolts, install new spindle
Table Uneven movement, wear Inspect for scratches, test for smooth movement Detach from machine, clean surfaces, align new table, secure bolts
Lead Screw Backlash, difficulty in movement Test for slippage, check for wear Remove end caps, unscrew lead screw, replace with new one
Feed Motor Inconsistent feeding, motor failure Check for power supply, listen for humming Disconnect connections, unbolt motor, install new motor, reconnect
Quill Play, stiffness Check for smoothness, vertical play Remove quill lock, pull out quill, replace with new assembly

Maintenance Tips for Prolonging the Life of Milling Machine Parts

Maintaining milling machine parts is crucial for productivity. Regular maintenance can extend machine life significantly. According to a recent industry report, proper upkeep can enhance machinery lifespan by up to 30%. Simple tasks can yield substantial benefits.

Daily checks on lubrication levels play a key role. Insufficient lubrication often leads to increased wear and tear. In fact, approximately 40% of machinery failures stem from poor lubrication practices. Inspecting belts and pulleys frequently helps catch issues early. Replace components showing signs of wear to prevent bigger problems down the line.

Machine cleanliness also matters. Dust and debris can interfere with operations. A clean machine is often more efficient. Scheduling regular cleanings is essential. Many workshops overlook this aspect, leading to premature component failures.
Consider using a checklist for routine maintenance. This helps ensure tasks aren't missed, and components are regularly assessed.

Scroll to Top